
Changing the font on your iPhone can be a great way to personalize your device and make it feel more like your own. Fortunately, there are many apps available that can help you do just that, including iFont. In this article, we will explore how to change the font on your iPhone with iFont, step by step.
Step 1: Download iFont
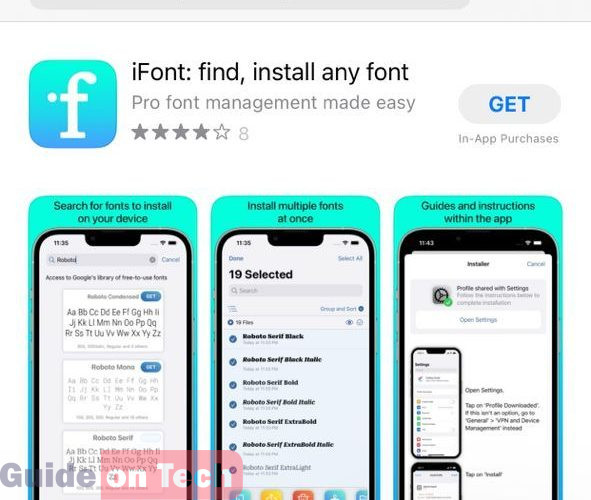
The first step in changing the font on your iPhone with iFont is to download the app from the App Store. To do this, open the App Store on your iPhone and search for “iFont.” Once you find the app, tap on the “Get” button to download and install it.
https://apps.apple.com/us/app/ifont-find-install-any-font/id1173222289
Step 2: Install the fonts
Once you have downloaded iFont, you will need to install the fonts that you want to use on your iPhone. To do this, open the iFont app and tap on the “Online” tab at the bottom of the screen. From here, you can browse through the available fonts and select the ones that you like.
When you find a font that you want to install, tap on it to view more information about it. You can then tap on the “Download” button to install the font onto your iPhone. Repeat this process for each font that you want to install.
Step 3: Apply the font
Once you have installed the fonts that you want to use, you can apply them to your iPhone. To do this, open the iFont app and tap on the “My” tab at the bottom of the screen. From here, you will see a list of all the fonts that you have installed.
Tap on the font that you want to use and then tap on the “Set” button at the top of the screen. You will then be taken to the “Profiles” page on your iPhone, where you will need to tap on the “Install” button to install the font profile onto your device.
Once the font profile is installed, you can go to your iPhone’s Settings app and select the “General” tab. From here, tap on the “Profile” option and select the font profile that you just installed. You will then be prompted to allow the installation of the font profile. Tap on the “Allow” button to continue.
After the font profile is installed, you can go back to the iFont app and tap on the “Set” button again. This time, you should see the font that you installed listed under the “Installed” section. Tap on the font to apply it to your device.
Step 4: Customize the font
After you have applied the font to your iPhone, you can customize it further by adjusting its size, color, and other settings. To do this, go to your iPhone’s Settings app and select the “Display & Brightness” option.
From here, you can adjust the font size by moving the slider to the left or right. You can also change the color of the font by selecting the “Text Size” option and then tapping on the “Color” button. This will allow you to choose a different color for your font.
Other customizations that you can make to your font include adjusting the font weight, enabling bold text, and adjusting the text size of specific apps. To do this, go to your iPhone’s Settings app and select the “Accessibility” option. From here, you can make a variety of adjustments to your device’s display settings.
Conclusion Changing the font on your iPhone can be a great way to personalize your device and make it feel more like your own. With iFont, it is easy to install and apply new fonts to your device, and you can customize them further by adjusting their size, color, and other settings. By following the steps outlined in this article, you can change the font on Your iPhone with iFont.
Picture Direction


